In my previous post on version control systems (VCS), I discussed why strong version control skills are essential and highlighted Git as one of the most widely used VCS tools.
To make managing Git repositories and assignments easier, GitHub Classroom was created. It’s built on top of GitHub, the online platform for hosting Git projects, but is specifically designed for classrooms. With GitHub Classroom, educators can provide starter code, automatically organize student repositories, and provide students a simple way to submit their work, using a workflow that mirrors how professional developers manage projects.
Although GitHub Classroom is built on GitHub, creating repositories works a little differently: you must first accept the assignment before a repository is created for you.
🛠 Accept Assignment
📝 Version Control | 🕑5 minutes | Required Files : none
To begin using GitHub Classroom for your course assignments, you’ll need to connect your GitHub account to the classroom set up by your instructor. Follow these steps to get started:
Step 1: Connect Your GitHub Account to the Classroom
- Follow the Link Provided by Your Instructor
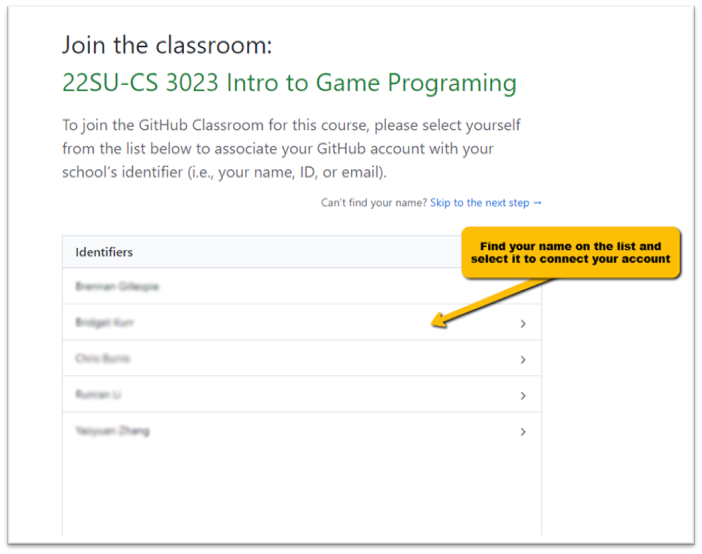
Go to the link shared by your instructor (you can find it in the course LMS). - Select Your Name from the List
Once the page loads, find your name and select it from the list of students to connect your account.
No Student List
If you don’t see a list of students to select from, simply accept the assignment by following the steps below. Accepting the assignment will automatically add you to the GitHub Classroom course.
Step 2: Accept Your Assignment
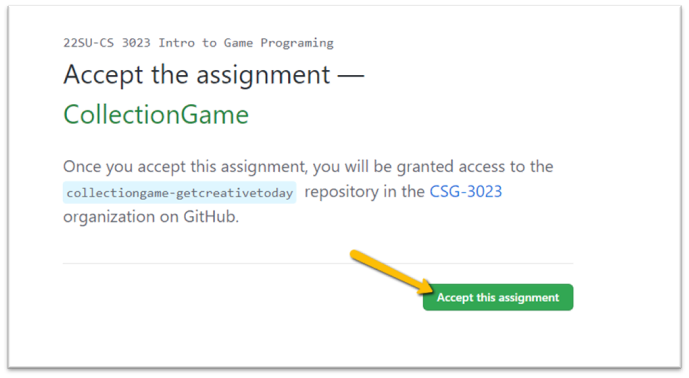
Each assignment in GitHub Classroom will have its own repository that will automatically be created when you accept the assignment.
- Click the Link for the Assignment
Use the link provided by your instructor to navigate to the assignment page. - Accept the Assignment
Click on Accept the assignment to join the course repository.
Step 3: View Your Repository
Once you’ve accepted the assignment, you will want to access repository (commonly referred to as a repo) page on Github.
- Refresh the acceptance page to see your repository.
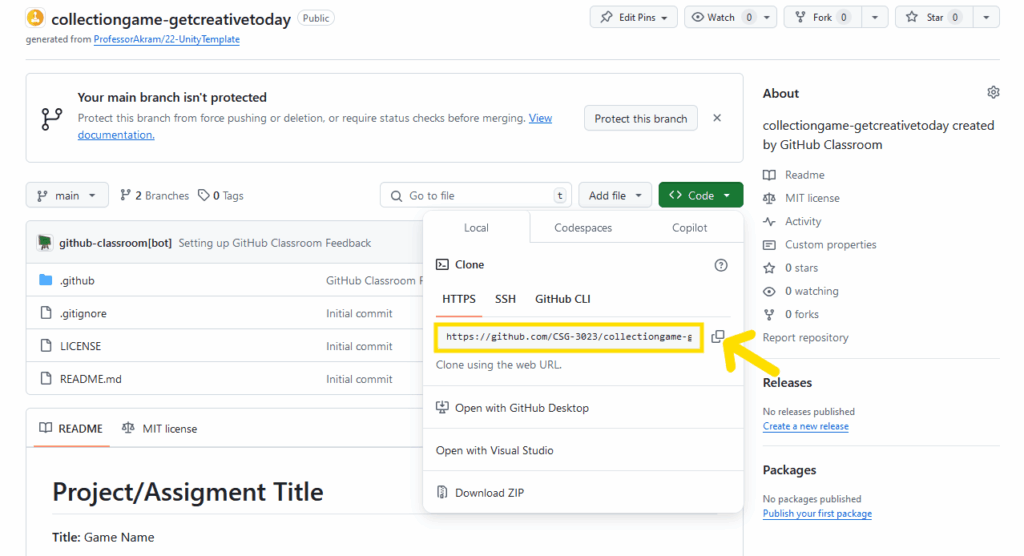
To start working with your repository locally, you will need to copy the repo’s web URL.
- Copy the Repository URL
On the repository page, click the Code button. From the dropdown, copy the HTTPS URL of the repository.
🛠 Cloning a Repository
📝 Version Control | 🕑5 minutes | Required Files : none
In order to work on the GitHub classroom assignment, a local copy of the repo will need to be made. There are several methods for cloning repos, for this tutorial, we will be using GitHub Desktop.
Ensure Git is Installed
Before using GitHub Desktop, make sure Git is installed on your computer. Additionally, consider installing Git Large File Storage (LFS) for projects involving large files (>2MB), such as game development with assets.
Step 1: Open GitHub Desktop and Log In
- Launch GitHub Desktop
Open GitHub Desktop on your computer. - Log In to Your Account
Make sure you are logged in to your GitHub account in the desktop app.
Step 2: Clone the Repository
- Navigate to Clone Repository
In GitHub Desktop, go to the menu bar and clickFile>Clone Repository.

Step 3: Select Your Repository
- Choose from Your Repositories
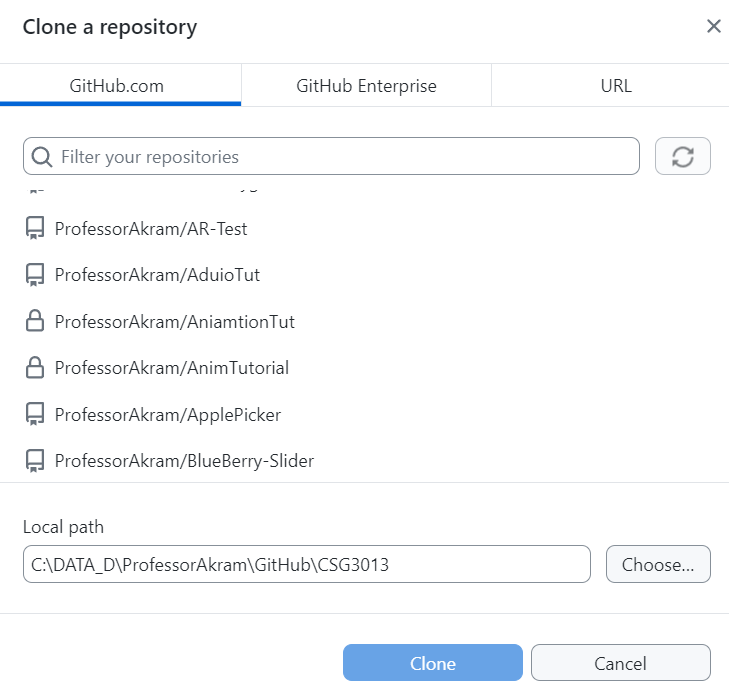
A new window will appear displaying all the repositories available in your GitHub account. Select the repository you want to clone locally.
Step 4: Clone via URL (if needed)
If you have a large number of repositories or if you are cloning a GitHub Classroom Assignment, you may want to use the URL option.
- Click the
URLTab
In the dialog box, click the URL tab at the top. - Paste the Git URL
Paste the git URL you copied from the repository page on GitHub. - Set the Clone Location
Choose the folder where you want to save the repository on your local machine, then press Clone.
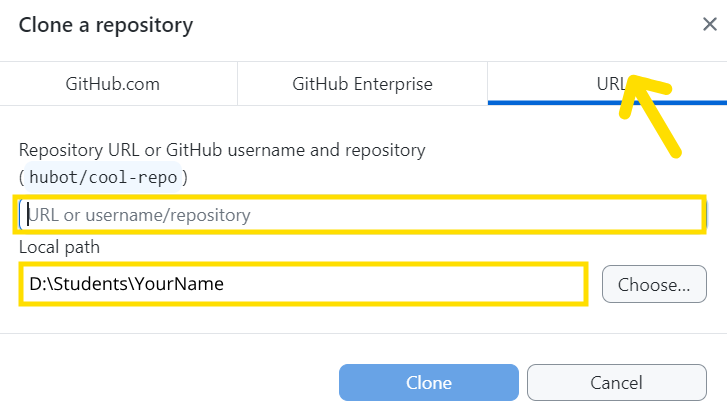
Cloned Repo Save Location
Make sure you select the correct location to save your local repository. In the example above, I have my students save their cloned repositories on the D: drive using the following folder structure:D:\Students\YourName.
Once cloned, you’ll have a local copy of your repository and can begin making changes that sync with GitHub.